Working with Broadcast Messages at AWeber, but aren’t sure hot to navigate the rather new AWeber interface? It’s simple when you’re used to doing it, but at first, it can be intimidating.
I’ve been on AWeber since about 2006. Yeah, I went to MailChimp to save a buck for about 6 months. Then, they started charging for every little thing, so I’m right back where I started. In the long run, at least for me, AWeber is the better deal all the way around. If you’re looking for a great autoresponder, AWeber is it. Check it out: https://MagnaSites.com/aweber\. (Right up front, yes… I get a small perk from advertising my link, but it won’t cost you one extra cent.)
In 2024 (because things change, you know) this is how you create a Broadcast Message at AWeber:
- Log into AWeber
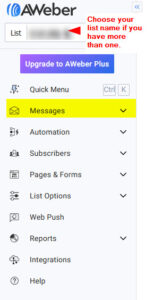
- At your upper left-hand, choose the list that you want to work with. (If you have only one list, this isn’t a necessary step.)
- Also, on the LH side, you’ll see the vertical ribbon with info about your mailing list — Messages, Subscribers, etc .
- Click on “Messages,” then “All Messages.”

Tip: If you have a newsletter, Create a template from an earlier mailing with just boilerplate information. You can just attach a different PDF of your newsletter each time you send a message to the list you chose for this purpose.
- Open any message you want to copy.
- Scroll to the bottom of the statistics and such, and click on “Copy to Drafts.”

- Go back to “Messages,” “All Messages.”
- You’ll see two messages now with the same title. You’ll need to edit the newest message, so click on the new message you just created.
- In the upper left-hand corner, Change the title and save. Just add numbers to make it easier, maybe?

- If you created a template earlier (create a message from scratch and save it as a template. If you use basic boilerplate-type information in the message, unless you want to change it each time, you’ll just need to spend about a minute doing this. Or… If this is your first message? Write some text.
- If there was an attachment in your earlier message, you’ll need to change the attachment.
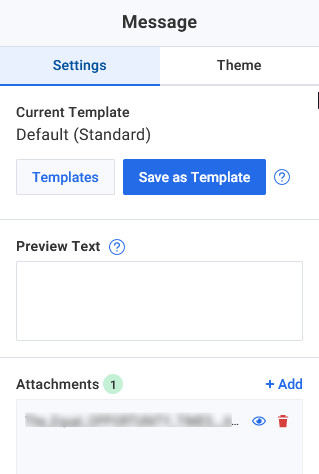
- Look to your right. At the top, it says “Message.” Under there are two tabs — Settings and Template. You want the Settings tab, which is where it should open.

-
- Look down the side until you see “Attachments.”
- Delete the old attachment by clicking on the little red garbage can.
- Click +Add and navigate to the file that you want to attach to your message.
- At bottom right, click “Save and Exit.”
- Go back to “Messages.”
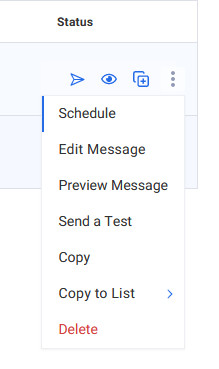
- On the newest message (at the top), scan right to the three vertical dots.

- When you rest your cursor there, you’ll see “Schedule” as the topmost option. Click there.
- Follow the directions to schedule your post.
- Click Send or Schedule at the bottom right of the screen
TaDA! You send your first message. Congratulations! Today, you are a marketer. 🙂


